Welcome to Hydra Comics! Here, we bring you the latest news, reviews, and insights into the world of comics and manga. From the classic heroes and villains of Marvel and DC Comics to the up-and-coming independent publishers, we cover it all. Our team of passionate comic book fans and industry experts provide quality information about comics and manga past present and future. Whether you’re a long-time fan or just getting started, our site is the perfect destination for anyone looking to dive into the world of comics. So come explore with us and discover the endless possibilities of this exciting and dynamic medium.
The Dynamic Star-Spangled Zenith: Celebrating John Byrne’s Captain America Run
There is an old, persistent maxim in the comic book industry: “The best runs are the ones that leave you wanting more.” If that is the golden yardstick of sequential art storytelling, then the brief, blazing partnership of legendary penciler John Byrne and master writer Roger Stern on Marvel’s Captain America isn’t just a classic—it is an absolute masterpiece.
Spanning a mere nine issues from Captain America #247 to #255 (1980–1981), this era is revered by comic historians and die-hard collectors as a high-water mark for the Sentinel of Liberty. It was an alignment of the stars. John Byrne was already redefining cosmic superheroics over on Uncanny X-Men alongside Chris Claremont. Roger Stern was refining his tight, character-driven, lore-respecting narrative style. When the two paired up to chronicle the adventures of Steve Rogers, they didn’t just draw and write standard monthly superhero filler. They stripped away years of convoluted continuity, grounded the hero in a rich, working-class Brooklyn environment, and delivered a kinetically charged, cinematic vision of Captain America that still dictates how the character is handled today.
For regular visitors of HydraComics.com, this is a deep dive into an era where every single panel crackled with energy. Here is the definitive guide to the legendary John Byrne and Roger Stern run on Captain America, why it remains essential reading, and the 5 must-have key issues every collector needs to add to their shortboxes immediately.
The Landscape of 1980: Resetting a Living Legend
To understand why the John Byrne run feels so revolutionary, one must look at where Captain America stood at the turn of the decade. The late 1970s had been a turbulent period for Steve Rogers. Following Jack Kirby’s bombastic, mind-bending return to the title in the mid-70s—which focused heavily on sci-fi high concepts and frantic, psychedelic action—the book had drifted slightly. Cap was occasionally caught between being a high-flying superhero and an outdated relic of the Greatest Generation, with subsequent creators struggling to balance his wartime origin with the rapidly shifting, cynical cultural landscape of post-Watergate America.
Enter Roger Stern and John Byrne. Having previously collaborated on fanzines before entering the professional arena, the duo shared a profound, unspoken creative shorthand. They viewed Captain America not as a political mouth-piece or a hollow icon, but as a deeply human man named Steve Rogers who happened to carry the weight of an entire nation’s ideals on his vibranium-steel shield.
The very first order of business in Captain America #247 was fixing what modern fans call “continuity blunders”. Over the years, well-meaning writers had added contradictory details to Cap’s back-story—including giving him a confusing middle name (“Grant”) and mismatched memories about his childhood and pre-war life. Stern and Byrne elegantly solved this via a narrative device: it was revealed that the U.S. Army had chemically implanted false memories into Steve Rogers prior to deployment to ensure that if he were captured by the Gestapo, he could never accidentally compromise his true civilian identity or the secrets of Project: Rebirth.
With the past cleared up, Byrne and Stern looked to the future. They moved Steve Rogers out of his sterile routine and into a brownstone apartment in Brooklyn Heights. They surrounded him with a vibrant, civilian supporting cast, most notably introducing Bernie Rosenthal, a sharp, independent glassblower who would become one of the most organic and beloved romantic interests in Captain America’s history. Suddenly, Cap wasn’t just a transient soldier; he was a neighbor, an commercial artist trying to pay rent, and a living person trying to find his footing in modern New York City.
The Visual Mastery of John Byrne
It is impossible to overstate the visual impact John Byrne brought to this title. In 1980, Byrne was arguably the most dynamic storyteller in the medium. Paired with the sharp, crisp, and definitive inks of Josef Rubinstein, Byrne’s artwork on Captain America leaped off the page with a level of dimensional realism and muscular grace that few artists could match.
Before Byrne, many artists drew Captain America’s chainmail top as a flat pattern of scales. Byrne gave it texture, weight, and metallic sheen. He understood the physics of Cap’s shield. In Byrne’s hands, the shield wasn’t just a prop; it was a dynamic extension of Cap’s body. The ricochets were carefully calculated across panels, slicing through the air with a palpable sense of momentum.
More importantly, Byrne mastered the quiet moments. His Steve Rogers was physically imposing yet carried a gentle, unassuming posture when out of uniform. The facial expressions were expressive without being cartoonish. Whether Cap was brooding over an old footlocker at Fort Dix or sharing a warm laugh with Bernie Rosenthal, Byrne’s peerless character acting made the human elements of the story every bit as compelling as the explosive action sequences.
The Narrative Formula: Republic Serials and High Stakes
Roger Stern and John Byrne structured their run like the old cinematic Republic serials of the 1940s—the very films a young Steve Rogers would have watched in theater houses before the war. The pacing was relentlessly economical. No story arc lasted longer than two issues, yet each one contained a dizzying amount of character development, explosive action, and high-concept plotting.
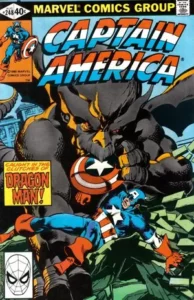
The rogues’ gallery showcased during these nine issues highlights the creators’ versatility. Cap fought the high-tech machinations of Machinesmith and a robotic Baron Strucker; he contended with the sheer elemental power of Dragon Man; and he went toe-to-toe with the bizarre, mismatched criminal duo of Batroc the Leaper and Mister Hyde.
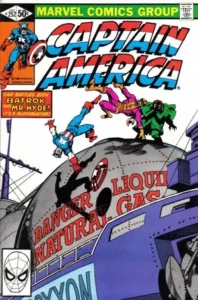
The Batroc and Hyde two-parter (Captain America #251–252) perfectly illustrates the run’s brilliant tonal balance. Batroc is treated with a wonderful, sardonic wit—a theatrical mercenary who values a sense of professional honor—while Mister Hyde is depicted as an unhinged, genuinely terrifying engine of mass murder. The arc culminates in a death-defying, classic cliffhanger where Captain America is chained to the bow of a massive Roxxon oil tanker that Mister Hyde has set on a high-speed ramming course toward the docks of New York City. It was pure, unadulterated comic book joy, executed with flawless technical skill.
The Heart of the Run: A Vampire in the Blitz and Political Idealism
If the run was nothing but high-octane superhero slugfests, it would still be fondly remembered. However, what elevates the John Byrne and Roger Stern era to legendary status are two distinct storylines that challenged what a Captain America comic could say and do.
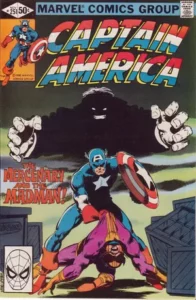
The first was the two-part British horror epic in Captain America #253–254. Traveling to England, Cap reunites with his old World War II allies from the Invaders, specifically the aging Lord Falsworth (the original Union Jack). They discover that Falsworth’s brother—the sadistic, vampiric Nazi saboteur Baron Blood—has returned to terrorize the English countryside.
This storyline pushed the boundaries of the Comics Code Authority at the time, drenching the book in gothic, fog-laden atmosphere. It forced Cap into an agonizing moral corner. Facing an immortal creature of pure evil that could not be reasoned with or permanently jailed, Steve Rogers is forced to make a harrowing choice. The climax of issue #254 remains one of the most jaw-dropping, seminal panels in Marvel history: Captain America uses his shield to cleanly decapitate Baron Blood. It was a stark reminder that while Cap values life above all else, he is also a soldier who will do whatever it takes to protect the innocent from ultimate darkness.
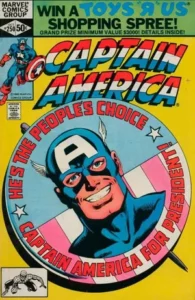
The second legendary storyline took place in the landmark Captain America #250. In a brilliant pop-culture civics lesson, a minor political third party approaches Captain America and formally requests that he run for President of the United States. The premise caught fire in the real world, generating genuine mainstream media coverage in the summer of 1980.
Rather than treating the concept as a cheap gimmick or launching into a heavy-handed political lecture, Stern and Byrne used the issue to examine the profound nature of the American Dream. Cap spends the issue deeply reflecting on his role as a symbol. In a beautifully written, televised address to the nation at the issue’s conclusion, he ultimately declines the nomination. His reasoning is profound: the President must answer to the realities of political compromise and the machinery of government, whereas Captain America must remain an untainted, uncompromised ideal that all Americans—regardless of political affiliation—can look up to. It is an essential piece of text that defines the core philosophy of the character to this very day.
Must-Have Issues for Collectors
For any serious collector or fan of John Byrne and Captain America, tracking down the original single issues from this run is an absolute joy. They feature some of the most striking cover art of the Bronze Age and represent crucial moments in the Marvel mythos. Here are four absolute essential “must-haves” for your collection:
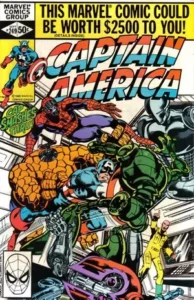
1. Captain America #247 (July 1980) – “By the Dawn’s Early Light!”
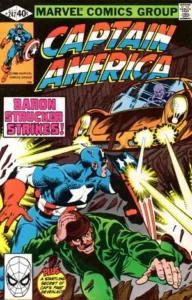
- Why it’s essential: This is the grand opening salvo of the Stern/Byrne era. Not only does it feature a powerhouse cover of Cap bursting through an old brick wall, but it serves as the crucial “housecleaning” issue that elegantly rewrites Cap’s messy memory continuity. It also features the very first appearance (albeit an unnamed cameo) of Bernie Rosenthal, who would become Steve’s definitive Bronze Age love interest.
- Collector’s Note: Look for clean, white-page copies; the bright yellow background on the cover is notoriously prone to showing spine ticks and dirt transfer.
2. Captain America #250 (October 1980) – “Cap For President!”
- Why it’s essential: One of the most famous and culturally significant single issues in the entire history of the title.The iconic cover—featuring Cap’s smiling face framed perfectly inside a red, white, and blue political campaign button—is an absolute masterpiece of graphic design. The story inside is a masterclass in superhero philosophy and character logic.
- Collector’s Note: Because of the mainstream media attention this issue received back in 1980, many copies were bought and saved, making it relatively accessible, but high-grade (CGC 9.6 or higher) copies still command a premium due to the massive demand for that iconic cover.
3. Captain America #253 (January 1981) – “Shoulder to Shoulder with… Union Jack!”
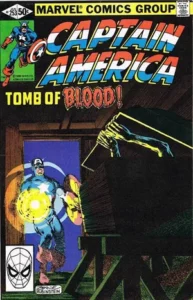
- Why it’s essential: This issue kicks off the legendary Baron Blood gothic horror storyline. The atmosphere Byrne conjures up in the English countryside is dripping with mood, and the issue introduces Kenneth Crichton while honoring the rich history of Marvel’s premier World War II superhero team, the Invaders.
- Collector’s Note: The cover features a stark, terrifying image of a vampire’s hands clawing out of a coffin while Cap enters a dark room with his shield glowing—it is widely considered one of Byrne’s finest cover layouts from the entire run.
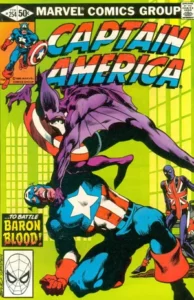
4. Captain America #254 (February 1981) – “Blood on the Moors”
- Why it’s essential: This is the stunning conclusion to the Baron Blood saga and features one of the most shocking, widely discussed climaxes of the Bronze Age. When Cap is forced to decapitate Baron Blood to stop his reign of terror, it permanently etched a line in the sand regarding what Steve Rogers is willing to do when facing absolute, irredeemable evil. It also marks the tragic death of the original Union Jack and the passing of the mantle to Joey Chapman.
- Collector’s Note: An absolute milestone key issue that has seen steady price appreciation over the years due to its historical significance and unforgettable story beats.
The Untimely End: What Could Have Been
As brilliant as the John Byrne and Roger Stern run was, it ended just as quickly as it began, leaving behind one of the greatest “What If?” scenarios in comic history.
The departure of the creative team is a subject of legendary comic book industry lore, with different creators recalling the events through slightly different lenses. According to Roger Stern, he was dealing with minor health issues while Byrne was preparing to get married. The editor at the time commissioned a fill-in issue to keep the book on schedule. However, because of Marvel’s editorial policies regarding a “continuity bonus”—an extra financial incentive paid to creators who maintained a consecutive, unbroken streak on a monthly title—the insertion of a fill-in issue would effectively strip Stern of his hard-earned bonus. Frustrated by the loss of momentum and the editorial decision, Stern chose to walk off the title. John Byrne, fiercely loyal to his friend and co-plotter, immediately resigned from the book in solidarity.
Byrne’s recollection adds an alternative layer of classic 1980s Marvel drama, pointing the finger directly at then-Editor-in-Chief Jim Shooter. According to Byrne, Shooter had recently instituted a strict editorial mandate dictating that all Marvel comic book stories had to be “done-in-one” self-contained narratives, completely outlawing multi-issue story arcs or cliffhangers to make books easier for casual newsstand buyers to pick up. Stern and Byrne had already meticulously plotted a massive, multi-part epic featuring Captain America’s ultimate arch-nemesis, the Red Skull. Refusing to compromise their vision or butcher their multi-issue epic into a compressed single issue, both creators walked away in protest.
Regardless of which version holds the exact truth, the result was a heartbreaking loss for the comic community. The planned Red Skull masterpiece was shelved, never to be drawn by Byrne, and a run that was actively tracking to rival the historic heights of Frank Miller’s Daredevil or Byrne’s own Fantastic Four was brought to a screeching, sudden halt.
Summary of the Stern/Byrne Era
“We wanted to create the definitive life story of Captain America… something that felt like a celebration of everything that made the character great.” — Roger Stern, reflecting on the creation of Issue #255.
The Lasting Legacy of War and Remembrance
Decades after its publication, the nine issues created by John Byrne and Roger Stern are frequently collected under the title Captain America: War and Remembrance. It remains a masterclass in how to treat a legacy superhero with reverence without becoming paralyzed by the weight of past continuity.
They proved that Captain America didn’t need to be cynical to be relevant in the modern era. By infusing the title with human warmth, peerless artistic draftsmanship, and a deep understanding of what makes Steve Rogers an enduring symbol of uncompromised idealism, Byrne and Stern created a blueprint. Subsequent legendary runs—from Mark Gruenwald’s sweeping epic in the late 80s and 90s to Ed Brubaker’s modern espionage masterpiece—all owe a massive creative debt to the brief, flawless nine months when John Byrne held the shield.
For collectors browsing the longboxes at their local comic shops or scrolling through online auctions, do not hesitate. Happy hunting, True Believers!